|
•
Jet's Dutch Tutorials
Jet's Original Tutorial here in Dutch
Download Supplies
Just left click on it and drag it to where you want it to go. The pencil will stay in position until you close your browser. Drag and Drop Script: © Dynamic Drive (http://www.dynamicdrive.com)
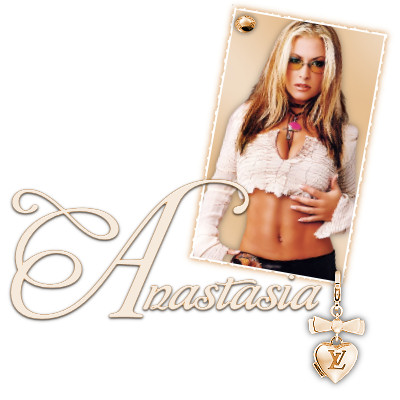
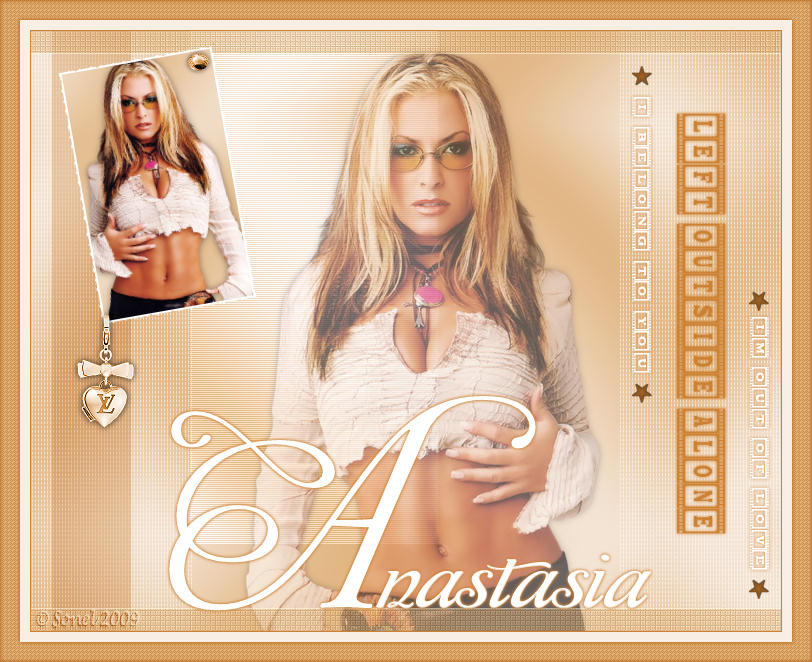
Open a New Image : 750 x 600 Transparent Set the Foreground colour to : #f8eee4 Set the Background colour to : #e0af76 Make a Gradient with the Foreground colour with the following settings: 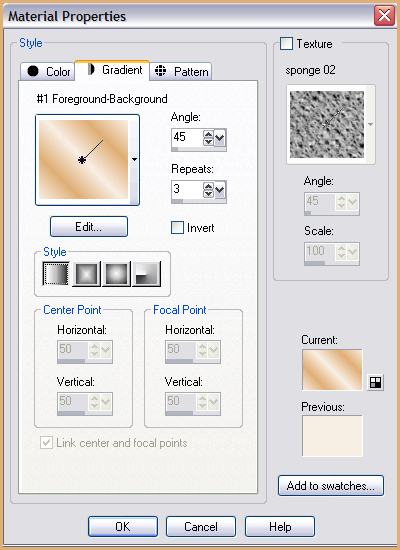 Floodfill your image with the Gradient Adjust - Blur - Gaussian Blur : 50 Effects - Plugins - Filters Unlimited 2.0 : Lens Effects - Convex, with the following settings: 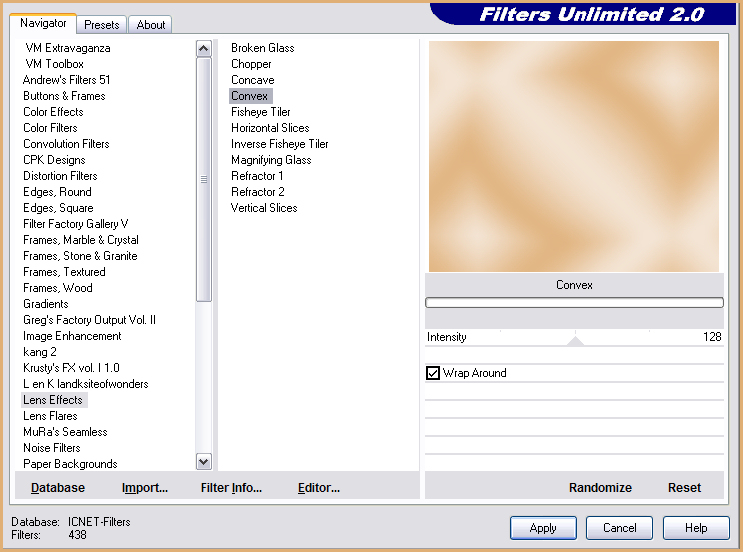 On the same Layer : Custom Selection with the following settings: (Follow Steps 1 - 3) 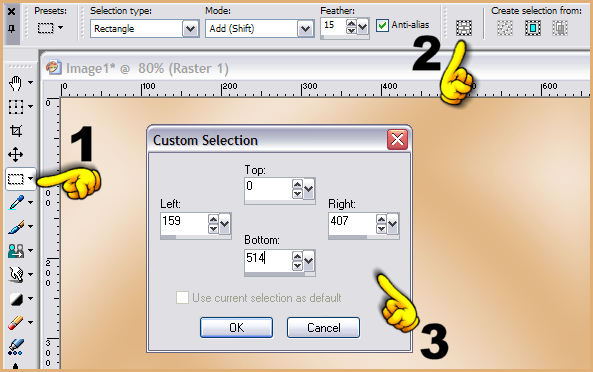 Selections - Promote Selection to Layer Selections - Select None Effects - Plugins - Penta.com - VTR2, with Standard Settings Blend Mode : Luminance (Legacy) Layers - New Raster Layer Set the Foreground colour to White Look for the brush : Pinceau_Yuna_34 Apply it on the left - next to the strip With the Raster Deform Tool, pull it downwards Layers - Duplicate - Image - Mirror Copy the tube (jet-celeb.anastasia-mei-2007.pspimage) and Paste as New Layer Image - Resize : 85% Bicubic (Resize all layers NOT ticked) Move the tube into position Set the Opacity Layer to: 60 Effects - 3D Effects - Drop Shadow : 0 - 0 - 40 - 10 - Black Layers - New Raster Layer Activate the Selection Tool - Custom Selection, with the following settings: 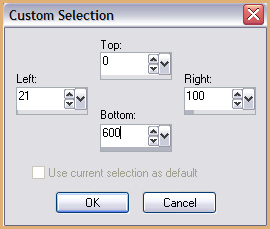 Floodfill it with your Background colour : #e0af76 Set the Blend Mode to : Multiply and the Opacity to : 45 Selections - Select None Layers - New Raster Layer Activate the Selection Tool - Custom Selection, with the following settings: 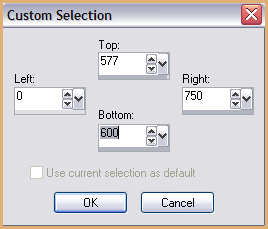 Floodfill it with your Background colour : #e0af76 Selections - Select None Effects - Plugins - Xero - Fritillary, with Standard Settings Effects - Edge Effects - Enhance Set the Layer Opacity to : 50 Layer - Duplicate - Image - Flip Save your work and Minimize this Working Image  Open a New Image : 160 x 260 Transparent Set the Foreground colour to : #f8eee4 Set the Background colour to : #e0af76 Make a Gradient with the Foreground colour, with the following settings: Floodfill the Layer with the Gradient Adjust - Blur - Gaussian Blur : 30 Layers - New Raster Layer Selections - Select All Open the tube (jet-celeb.anastasia-mei-2007.pspimage) Image - Mirror Copy and Paste into Selection Selections - Select None Effects - 3D Effects - Drop Shadow : 0 - 0 - 40 - 10 - Black Layers - Merge - Merge Visible Effects - Plugins - Filters Unlimited 2.0 - Photo Aging Kit - Photo Frame 01, with Standard Settings Activate the Magic Wand with the following settings:  Zoom in on the Image and click in the Black Border with the Magic Wand Selections - Modify - Expand : 1 pixel Press "Delete" Selections - Select None Copy the Image and Paste it on your Working Image of 750 x 600 Move it to the left, top corner Image - Rotate - Free Rotate : 10 degrees left (All layers NOT ticked) Adjust - Sharpness - Sharpen Effects - 3D Effects - Drop Shadow : 0 - 0 - 100 - 5 #cd8233 Copy the Button (Raster 2) from the knop-hanger-ster.pspimage Paste as New Layer Image - Resize : 80% Bicubic (Resize all layers NOT ticked) Move it into position Adjust - Hue and Saturation - Colorize : 23 - 162 Copy the Heart pendant (Raster 1) from the knop-hanger-ster.pspimage and Paste as New Layer Move it to the bottom of the smaller image and Colorize with the same settings as you did with the Button Lock the Foreground and set the Background colour to White Activate the Text Tool and look for the font : Affair, with the following settings:  (These Font settings were used in PSP 9) (For PSP X and higher the Text size : 300) Type the first letter : A Layers - Convert to Raster Layer Effects - 3D Effects - Drop Shadow : 0 - 0 - 100 - 5 - #cd8233 Layers - Duplicate Layers - Merge - Merge Down Activate the Text Tool and set the Text size : 60 (PSP9) and 200 (PSP X and higher) Type the rest of the name Layers - Convert to Raster Layer Effects - 3D Effects - Drop Shadow : 0 - 0 - 100 - 5 - #cd8233 Layers - Duplicate Layers - Merge - Merge Down Activate the Text Tool and look for the font : Bijou JL With the following settings, type the title of your text (size depends on the size of the title)  Image - Rotate - Free Rotate - Right (PSP9) Type a Title of one of your favourite songs and move into position Effects - 3D Effects - Drop Shadow : 0 - 0 - 100 - 5 - #cd8233 Do the same with the other Title and apply the same Drop Shadow Effects - 3D Effects - Drop Shadow : 0 - 0 - 100 - 5 - #cd8233 Set the Background colour to : #cd8233 Activate the Text Tool and set the Text size to your choice Type the Title that must come in the middle Image - Rotate - Free Rotate - Right (PSP 9) Copy the little star (Raster 3) from knop-hanger-ster.pspimage and Paste as New Layer before and after the smaller, white Titles Image - Add Borders : 1 pixel #cd8233 Image - Add Borders : 10 pixels #f8eee4 Image - Add Borders : 20 pixels #e0af76 Activate the Magic Wand and select the border (Tolerance : 0) Effects - Texture Effects - Weave, with the following settings: Weave Colour : #be752a 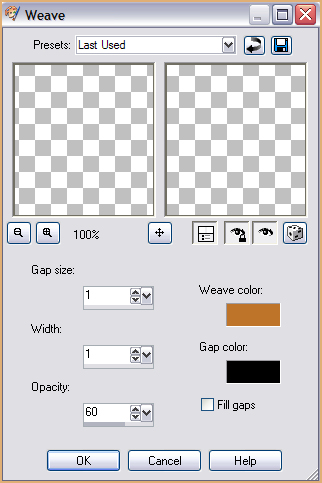 Leave Selection as it is Effects - 3D Effects - Cutout : 1 - 1 - 100 - 5 #be752a Repeat with : -1, -1, 100, 5 Selections - Select None Add your watermark and/or name and save a .jpeg TERMS OF USE Do not copy, rewrite or link in anyway without Jet or Sonel's written permission and NO Hotlinking please! Redistribution by word documents are not allowed. No permission will be given for that. Please don't offer the material somewhere else. Don't share the tubes or material in other groups without permission of the owner. If you don't understand my terms of use or do you have any questions, please send me an email.
• |