|
•
Jet's Dutch Tutorials
Jet's Original Tutorial here in Dutch
SUPPLIES Plug-ins Required Plugin Filter - Flaming Pear Solidify A : HERE Place the tubes and Background in a folder of your choice Place the PSP Selections in the Selections folder in PSP Place the font "Leaf1" in a folder of your choice.  Use this pencil to show
you where you are in the tutorial.
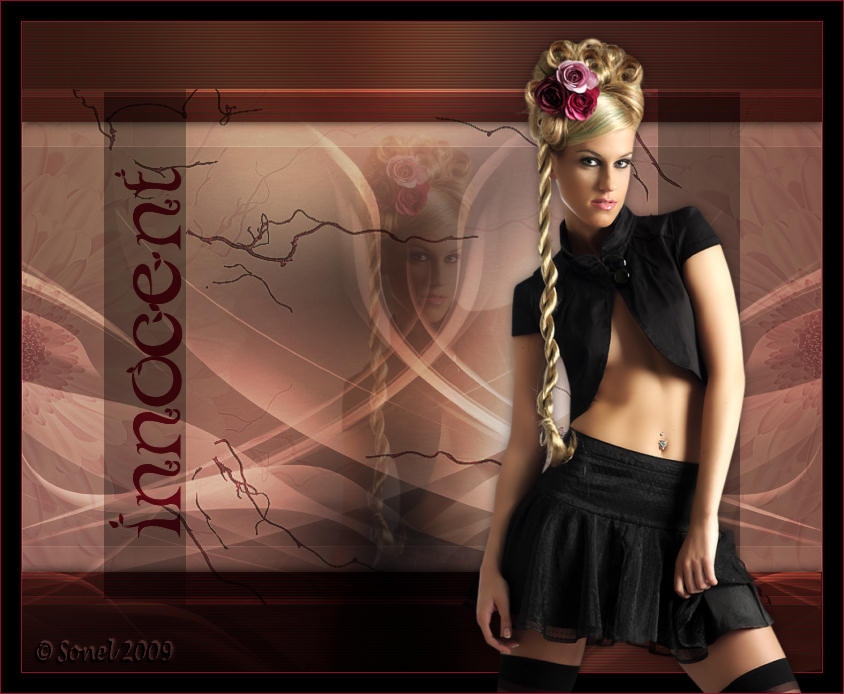
1. Open the tube "jet-woman-juli-2008.pspimage) 2. Edit - Copy 3. File - New - New Image : 800 x 650 transparent 4. Flood Fill - Fill the layer with the colour Black 5. Edit - Paste as New Layer (the tube is still in the clipboard memory) 6. Effects - Plugins - Flaming Pear : Solidify A 7. Adjust - Blur - Gaussian Blur : 50 8. Layers - Merge - Merge All (Flatten) 9. Open the tube "jet-innocent1-2008.pspimage) 10. Edit - Copy 11. Go back to your working canvas of 800 x 650 12. Edit - Paste as New Layer 13. Activate the Raster Deform Tool and click in the middle. and move it to the bottom - until the top line stands at 50 (see example below) 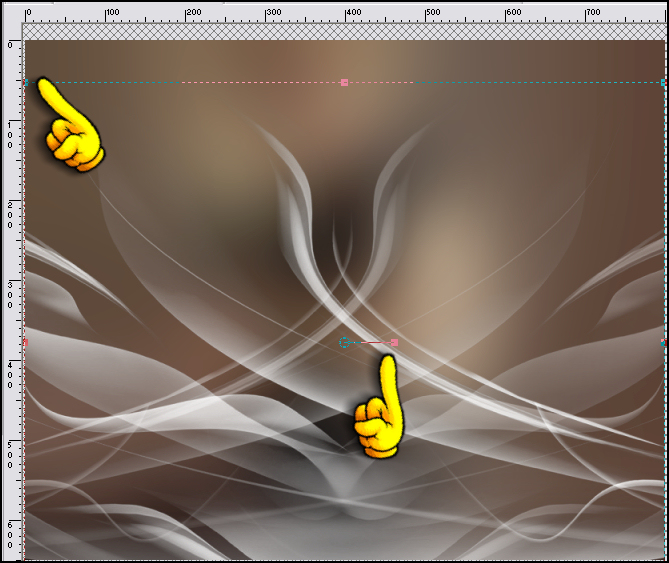 14. Layers Palette - Opacity : 93 Blend Mode : Overlay 15. Layers - New Raster Layer 16. Selections - Load/Save Selection - Load Selection From Disk : jet-sel-innocent1 17. Activate the Flood Fill Tool - Fill with Black (#000000) and set the Opacity Layer on 34 18. Selections - Select None 19. Layers - Merge - Merge Visible 20. Edit - Copy 21. Edit - Paste as New Image 22. Minimize
23. Open the tube "jet-innocent2-2008.pspimage" 24. Edit - Copy 25. Go back to your working canvas of 800 x 650 26. Edit - Paste as New Layer 27. Open the Duplicated Image that you've minimized 28. Edit - Copy 29. Go back to your working canvas of 800 x 650 30. Layers - New Raster Layer 31. Selections - Load/Save Selection - Load Selection From Disk : - jet-sel-innocent2 32. Edit - Paste into Selection 33. Selections - Select None 34. Layer Palette - Blend Mode - Multiply 35. Effects - Texture Effects - Blinds : with the following settings: 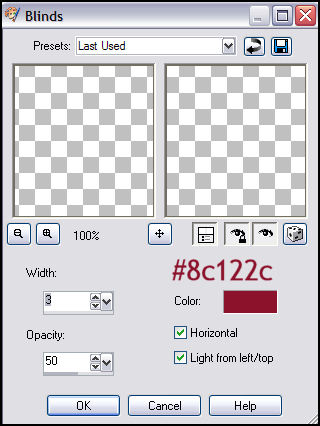 36. Effects - 3D Effects - Drop Shadow with the following settings: 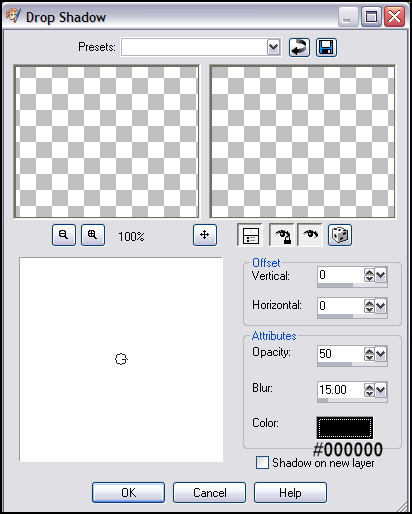 37. Open the background "flower-innocent.jpg" 38. Edit - Copy 39. Go back to your working canvas of 800 x 650 40. Edit - Paste as New
Layer 41. Effects - Image Effects - Offset - with the following settings: 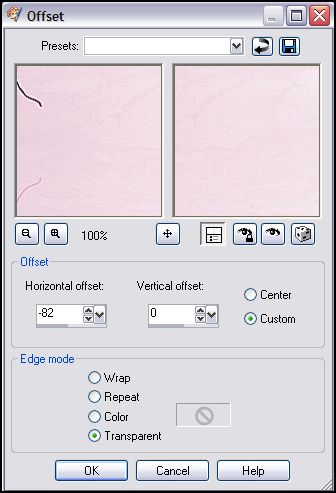 42. Layer Palette - Opacity : 50 Blend Mode : Overlay 43. Layers - Duplicate 44. Image - Mirror 45. Image - Flip 46. Open the tube : "jet-woman4-juli-2008.pspimage" 47. Edit - Copy 48. Go back to your working canvas of 800 x 650 49. Edit - Paste as New Layer 50. Layer Palette - Opacity : 40 Blend Mode : Soft Light 51. Move the tube to the middle (see example) 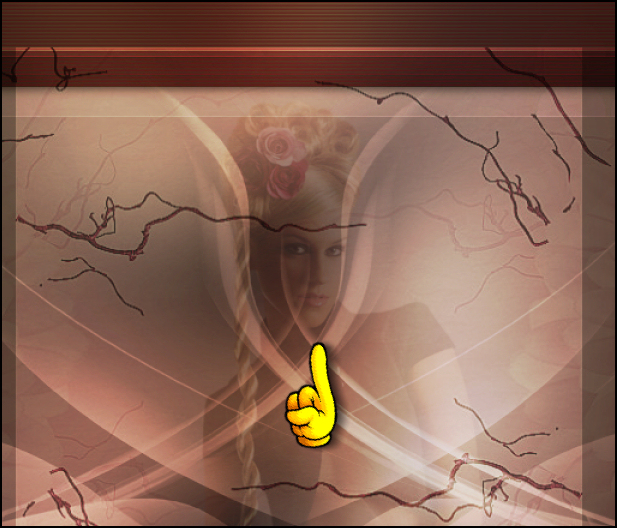 52. Image - Add Borders 1 pixel #8c122c (red) 53. Image - Rotate - Rotate Clockwise 90 54. Set the background colour on #8c122c (red) and lock the foreground colour 55. Open the font : Leaf1 and Minimize 56. Activate the Text Tool with the following settings:  57. Layer Palette - Blend Mode : Multiply 58. Resize and Move the Text to the top (see example) 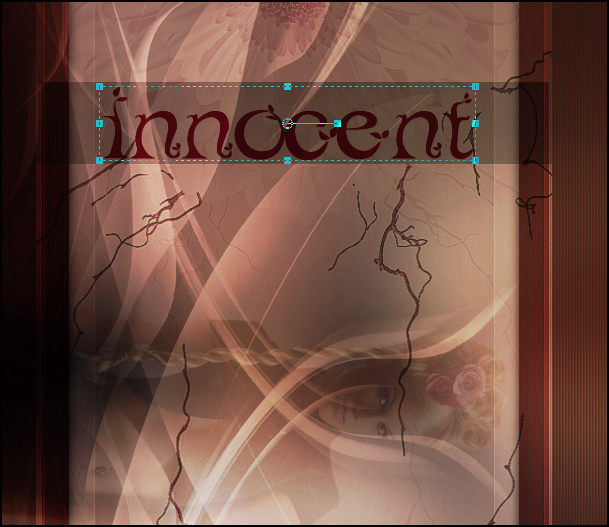 59. Layers - Convert to Raster layer 60. Image - Rotate - Rotate Counterclockwise 90 61. Image - Add Borders - 20 pixels - Black 62. Open the tube : "jet-woman4-juli-2008.pspimage" 63. Edit - Copy 64. Go back to your working canvas of 800 x 650 65. Edit - Paste as New Layer 66. Move the tube in place 67. Effects - 3D Effects - Drop Shadow - with the same settings as before: Image - Add Borders : 1 pixel #8c122c (red) Place your watermark and save as .jpg
TERMS OF USE Do not copy, rewrite or link in anyway without
•
|