|
•
Jet's Dutch Tutorials
Jet's Original Tutorial here in Dutch
SUPPLIES Plugin Filters
Graphics Plus HERE Sapphire Filter Plugin HERE Place the Brushes in the Brush Folder in PSP The lovely tubes are from Brigitte Ann Thais and Gini.
(I've done the translation using PSP 9)  Use this pencil to show
you where you are in the tutorial.
Just left click on it and drag it to where you want it to go. The pencil will stay in position until you close your browser. Drag and Drop Script: © Dynamic Drive (http://www.dynamicdrive.com)
Open a New Image : 700 x 500 transparent Set the Foreground Colour to : #3f400f Set the Background Colour to : #9daf01 Make a Gradient with the Foreground Colour, with the following settings: 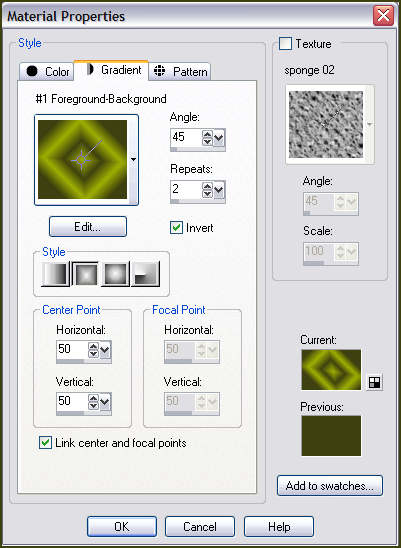 Flood Fill the canvas with the Gradient Layers - Duplicate Effects - Plugins - Sapphire Filters - Sapphire Plugin_0238, standard settings Set the Opacity to : 50 Layers - New Raster Layer Look for the Brush : gwyn_busto_uomo.PspBrush (I didn't place mine in the Brush Folder, but
opened it in PSP 9 instead. Go to : File - Export - Custom Brush A "Create Brush Tip" Popup will open Type in the Name : gwyn_busto_uomo Click OK and close the Brush) Apply the Brush once (1x) with the Foreground Colour : #3f400f on the left side of your image Activate the Raster Deform Tool and pull it to the right so that it fill the whole canvas Set the Opacity to : 40 Layers - New Raster Layer Selections - Select All Copy Mtm_Bloemen 194-Tulpen-small-1april 2007.pspimage and Paste into Selection Set the Blend Mode to : Luminance Legacy and the Opacity to : 18 Selections - Select None Copy RedPetals_MistedbyGini_12_09_06.psp and Paste as New Layer Image - Mirror Move the Rose to the right Set the Blend Mode to : Luminance Legacy and the Opacity to : 25 Layers - New Raster Layer Activate the Selection Tool - Choose Rectangle and Custom Selection, with the following settings:  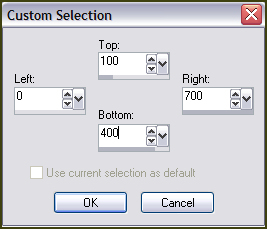 Flood Fill with the Foreground Colour : #3f400f Set the Opacity Layer to : 30 Selections - Select None Layers - New Raster Layer Selection Tool - Custom Selection, with the following settings: 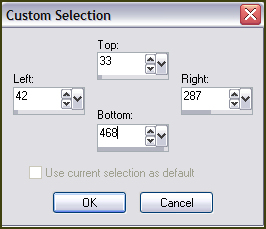 Flood Fill with the light Background Colour : #9daf01 Selections - Select None Set the Opacity Layer to : 16 Effects - Edge Effects - Enhance Layers - Duplicate Layers - Arrange - Move Down Effects - Image Effects - Offset, with the following settings: 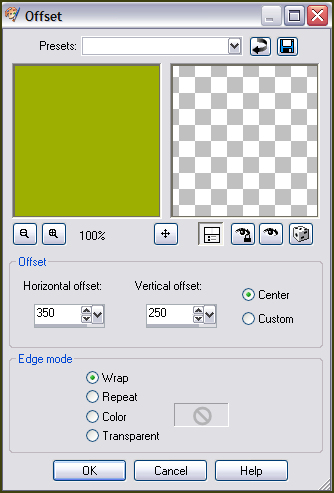 Open the tube : Eden[1]...Tha_ss.pspimage Adjust - Hue and Saturation - Colorize : Hue : 43 Saturation : 187
Copy and Paste as New Layer Image - Resize : 80% Bicubic Move it to the left - see example Set the Blend Mode to : Screen and the Opacity to : 45 Activate the Top Layer Copy the tube : @nn_330407_photos_018_womanleaves_tdstudio_small.psp and Paste as New Layer Move her into position Effects - 3D Effects - Drop Shadow, with the following settings: 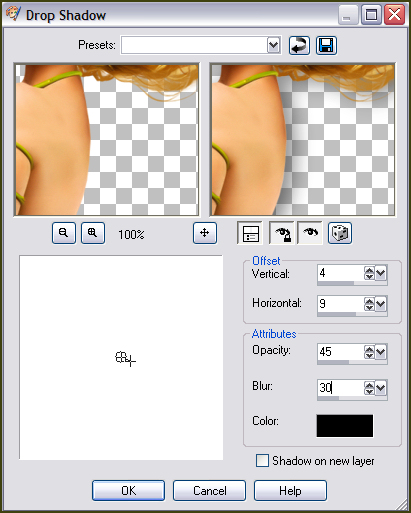 Layers - New Raster Layer Look for the Brush : elegance or open and Export Custom Brush as before Apply with the light colour (#9daf01) in the left block (see example) Effects - Edge Effects - Enhance Set the Opacity to : 30 Layers - New Raster Layer Look for the Brush : beautiful Apply with the light colour (#9daf01) in the right bottom corner (see example) Effects - Edge Effects - Enhance Set the Opacity to : 30 Image - Add Borders : 1 pixel using the dark colour (#3f400f) Image - Add Borders : 5 pixels using the light colour (#9daf0) Image - Add Borders : 40 pixels using the dark colour (#3f400f)
Activate the Magic Wand and select the dark border ( Anti-alias and Inside) Effects - Texture Effects - Weave, with the following settings: 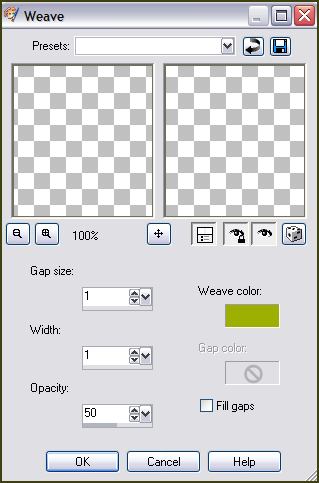 Selections - Select None Selections - Select All Selections - Modify - Contract : 20 pixels Selections - Modify - Select Selection Borders, with the following settings: 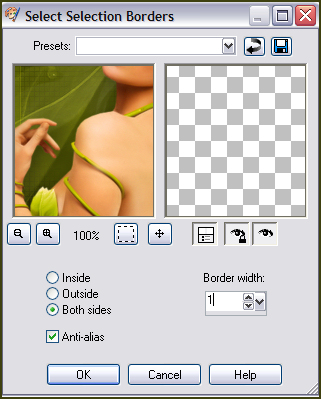 Flood Fill the selection with the light colour (#9daf01) Effects - Plugins - Graphics Plus - Cross Shadow, with the standard settings Selections - Select None Activate the Magic Wand and select the light border of 5 pixels Effects - Plugins - Graphics Plus - Cross Shadow, with the standard settings Selections - Select None Image - Add Borders : 1 pixel with the dark colour (#3f400f) TERMS OF USE Do not copy, rewrite or link in anyway without Jet or Sonel's written permission and NO Hotlinking please! Redistribution by word documents are not allowed. No permission will be given for that. Please don't offer the material somewhere else. Don't share the tubes or material in other groups without permission of the owner. If you don't understand my terms of use or do you have any questions, please send me an email.
•
|