1. File - New - New Image : 800 x 650 Transparent
2. Flood Fill Tool - Floodfill layer with #000000 (Black)
3. Layers - New Raster Layer
4. Flood Fill Tool - Floodfill layer with #7f831a (Green)
5. Layer Palette - Opacity : 25
6. Layers - New Raster Layer
7. Selections - Select All 8. Open jet-spring1.pspimage
9. Edit - Copy
10. Go back to your 850 x 650 working image
11. Edit - Paste into Selection
12. Selections - Select None
13. Layer Palette : Opacity : 32 and Blend Mode : Luminance (Legacy)
14. Layers - New Raster Layer
15. Selections - Load/Save Selection - Load Selection From Disk : jet-spring1
16. Floodfill with #7f831a (Green)
17. Layer Palette - Opacity : 30 and Blend Mode : Screen
18. Selections - Select None
19. Layers - Duplicate
20. Effects - Plugins : AP 01 (Innovations) - Lines-SilverLining with the following settings:
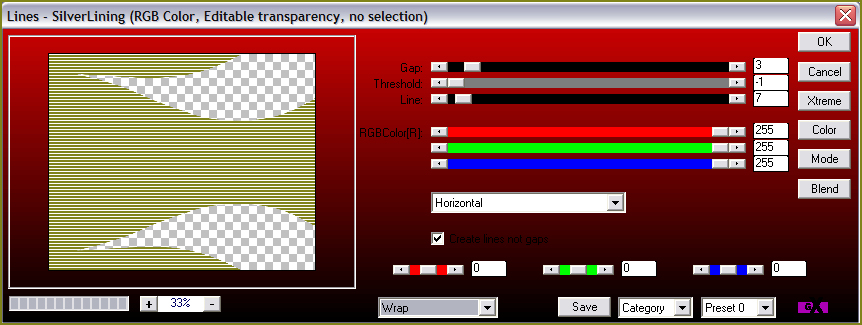
21. Layer Palette - Opacity : 10 and Blend Mode : Normal
22. Layers - New Raster Layer
23. Selections - Load/Save Selection - Load Selection From Disk : jet-spring2
24. Flood Fill Tool - Floodfill with #7f831a (Green)
25. Selections - Select None
26. Layer Palette - Opacity : 100 and Blend Mode : Multiply
27. Effects - Edge Effects - Enhance
28. Layers - New Raster Layer
29. Selections - Load/Save Selection - Load Selection From Disk : jet-spring3
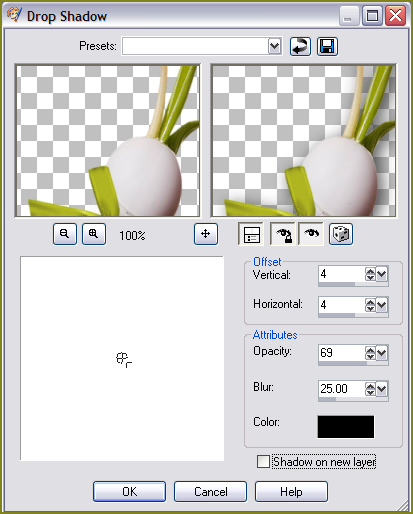
30. Flood Fill Tool - Floodfill with #fad154 (Yellow) 31. Selections - Select None
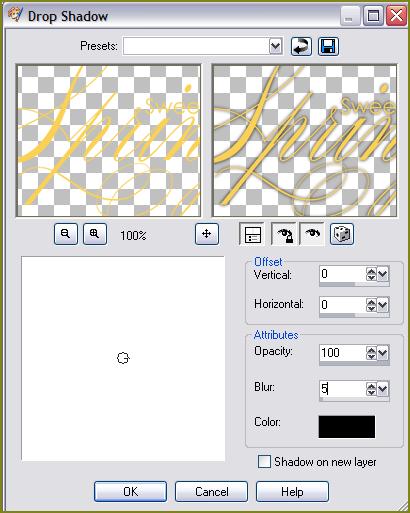
32. Effects - 3D Effects - Drop Shadow with the following settings :

33. Open the tube : jet-spring-flower.pspimage
34. Edit - Copy
35. Go back to your working image
36. Edit - Paste as New Layer 37. Move it down to the left corner
38. Layer Palette - Opacity : 70 and Blend Mode : Screen
39. Layers- Duplicate
40. Image - Mirror
41. Image - Flip
42. Layer Palette - Opacity : 50
43. Open the tube : jet-easterflower-februari-2009.pspimage
44. Image - Resize : 80% Smart Size 45. Edit - Copy
46. Go back to your working image
47. Edit - Paste as New Layer
48. Image : Mirror
49. Move this tube also down to the left corner
50. Layers - Duplicate
51. Adjust - Blur - Gaussian Blur : 50
52. Layers - Arrange - Move Down
53. Activate the Top Layer by clicking on it
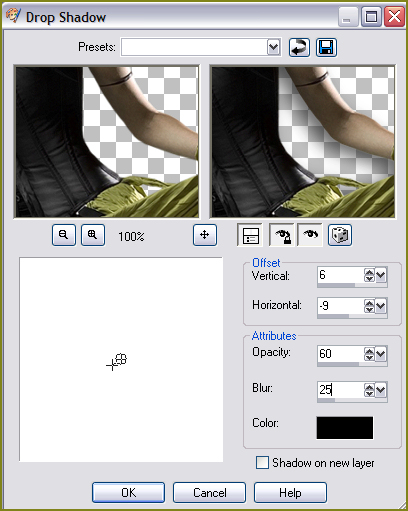
54. Effects - 3D Effects - Drop Shadow, with the following settings:
55. Open the tube : jet-woman8-september-2008.pspimage
56. Image - Resize : 90% Bicubic - Resize All Layers 57. Edit - Copy
58. Go back to your working image
59. Edit - Paste as New Layer
60. Move the tube into position 61. Effects - 3D Effects - Drop Shadow, with the following settings:
62. Open the WordArt : wordart-sweet-spring.pspimage
63. Edit - Copy
64. Go back to your working image
65. Edit - Paste as New Layer 66. Move the text into position 67. Effects - 3D Effects - Drop Shadow, with the following settings:
68. Image - Add Borders : 31 pixels #7f831a (Green)
69. Selections - Select All
70. Selections - Modify - Contract : 30 pixels
71. Selections - Invert
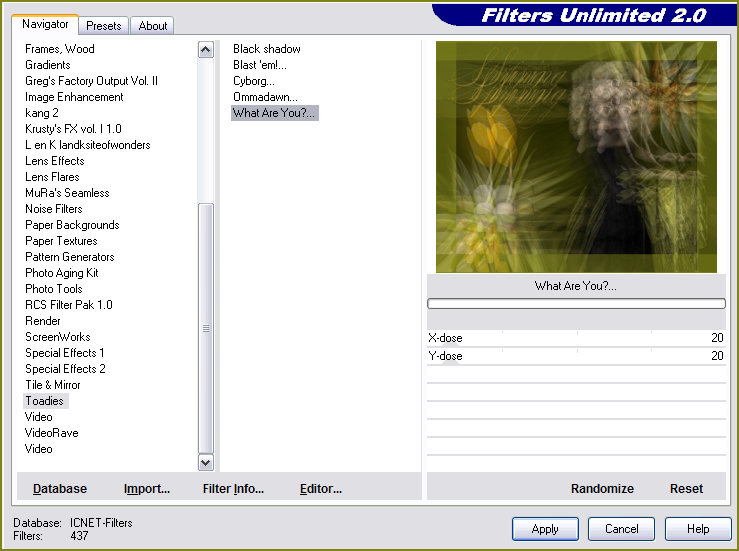
72. Effects - Plugins - Toadies - Who are you?
with the following settings:
73. Selections - Promote Selection to Layer
74. Layer Palette - Blend Mode : Multiply
75. Effects - Edge Effects - Enhance
76. Selections - Invert
77. Effects - 3D Effects - Drop Shadow, with the following settings:

78. Repeat the Drop Shadow
79. Selections - Select None
80. Image - Add Borders : 1 pixel #7f831a (Green)
81. Add your name or watermark and save as .jpg
|